This is a picture of the screw's location (after the entire resonator was removed) within a larger view of the engine.
The screw and resonator should look like this once you have loosened the screw and freed the resonator.

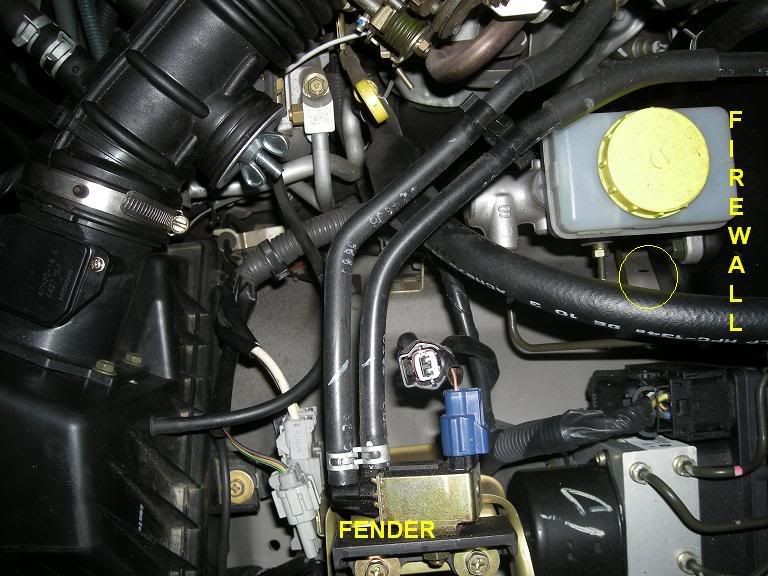
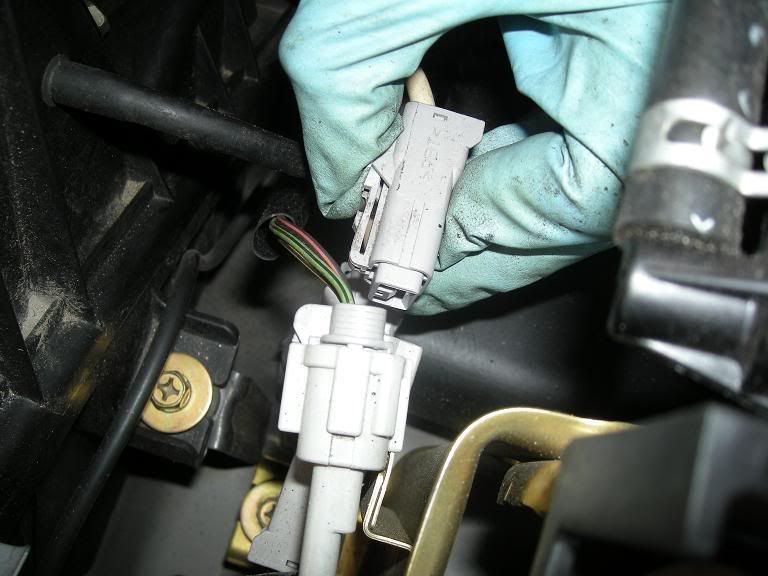
Next you will need to disconnect the two electrical plugs close to the inner fender to give you the working room you will need to remove the resonator. Don't forget to plug them back in when you are finished.
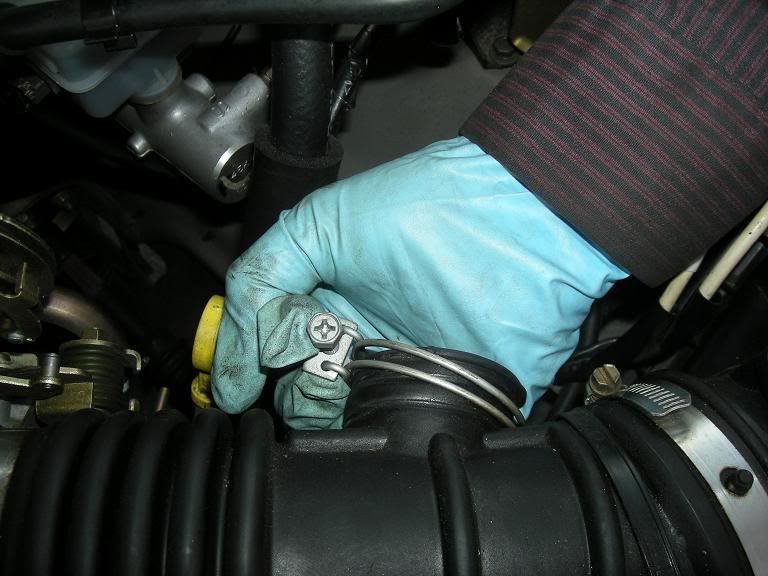
There is a black plastic clip holding a zip-tied wire loom to the resonator. You will take a pair of needle-nose pliers to pinch the bottom of the clip and remove the wiring from the resonator as shown.

Now, you will remove the remove the upper mounting screw for this resonator.
Once this screw is removed, simply pull the resonator out of the engine compartment as shown below.
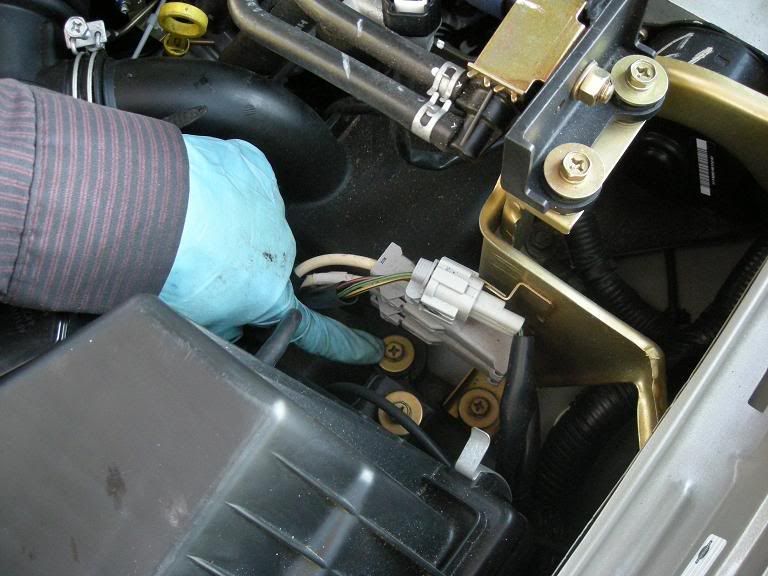
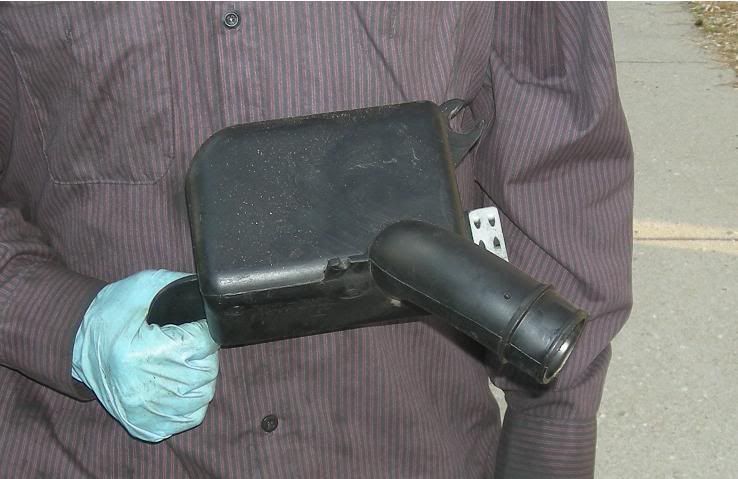
Resonator removed. At this point, go ahead and reconnect those two electrical plugs that you almost forgot to remove.
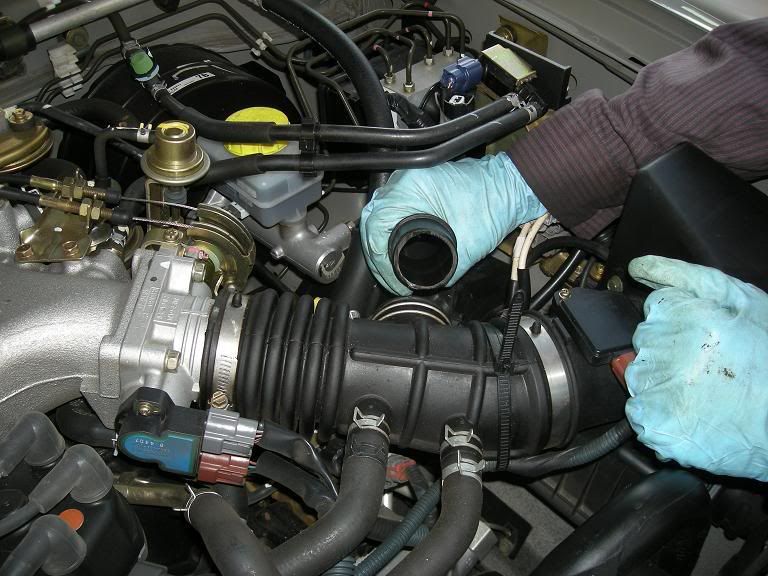
Make sure you also remove the hose clamp as shown below.
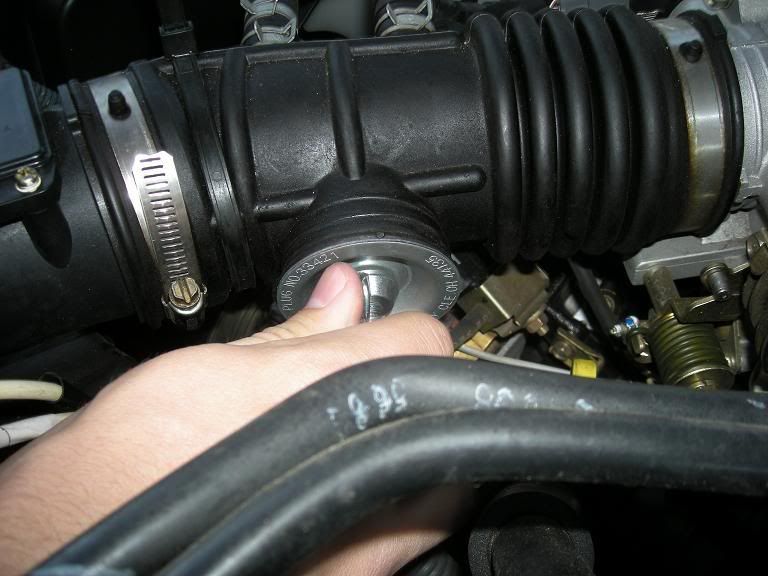
Now you will place the 2" PLUG in the hole on the intake hose as shown below. To do this, simply place the plug all the way into the hole until the top metal is flush with the hose and tighten the wing nut. DO NOT TIGHTEN EXCESSIVELY. There need only be a snug fit, too tight and it will pop back out.
THIS CONCLUDES THE REMOVAL OF THE FIRST RESONATOR. CONGRATULATIONS, 1/3 OF THE WAY DONE!!!
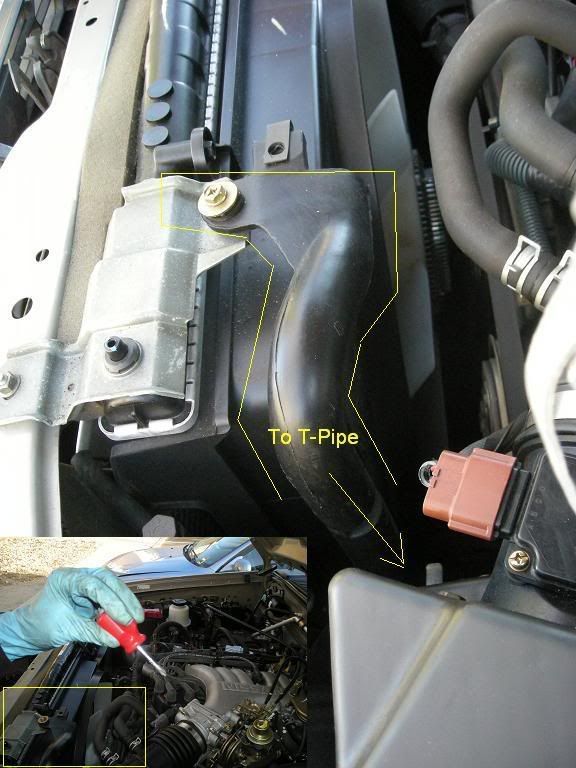
Next we'll tackle the radiator-mounted resonator. It is outlined in yellow below. The inset on the bottom left is provided to give you an idea as to it's location within the larger context of the engine compartment.


 Previous Topic
 Index
Index
