I realize there are other perfectly good writeups in this forum about doing the timing belt job. The main reason I'm posting this here is that someone asked me to in another thread.
This thread is about the Timing Belt replacement on the VG33E (1st generation 6 cylinder) engine. It also touches on other tidbits about things you should replace at the same time, such as the thermostat, waterpump, and bypass hose. I had originally posted it back in 2005 to a different forum, but since this forum is infinitely better, it makes sense to add it here. I must apologize in advance for the picture quality. The camera I had back in 2005 was a piece. The camera I have now is much better, so future posts from me won't be so blurry. I also removed some of the photos that weren't that important to make it in under the 8 pic limit.
Before I start copying and pasting, I'd also like to stress that it is very important that you obtain a new OEM timing belt at the dealership. The belt has marks on it to help you with alignment, and frankly I don't trust that other outfits will put the marks in the correct places. Other members of this forum may disagree and they are welcome to post their own experiences with other brands of timing belts, but those are my 2 cents about it.
Also, to ease fellow back yard mechanics in their search for TBelt replacement knowledge, here are links to some other TBelt posts in this forum:
Not much info here
Some Good TBelt info here.
And now my own writeup:My X had a little over 115,000 miles, it was time for some major maintenance/repairs. I'm not usually very diligent at routine maintenance; in fact I was content to wait another 10 or 20 thousand miles to do the Tbelt job (not recommended). BUT, I was forced into the job because of a minor coolant leak that developed into a major one. Unfortunately, it was coming from the general area of the water pump, and it was pretty much impossible for me to pinpoint the exact location of the leak.

I did some research and saw that there was a technical service bulletin out there for the water outlet housing gasket. I also read on here that people had experienced problems with the small bypass hose that goes from the thermostat housing to the water outlet housing. I've also had experience with water pump failure on other vehicles in the past. I was completely dumbfounded as to where this leak could be. Plus, I was past the recommended mileage for the timing belt replacement. So I decided to replace them all.
![[Smoking]](graemlins/smokin.gif)
Unfortunately, I didn't take pictures of the whole process. When I started putting everything back together is when I finally realized that some good pics might help someone else.
So lets get on with it already. You�ll want to store all nuts and bolts in plastic bags labeled with a sharpie.
1. Remove the splash guard.
2. Drain the coolant. You don't have to remove the drain plugs on the engine unless your wanting to do a thorough flush. Don't lose the radiator drain plug like I did.
3. Remove the upper radiator hose.
4. Unfasten the bolt holding on the metal pipe section of the lower radiator hose. Pull the lower radiator hose from the thermostat housing. Got a few hand scrapes here. It�s tight.
5. Undo the 4 small nuts holding the fan to the water pump. Be careful you don't drop them. A 10mm box end wrench works fine. You can either wriggle the fan free from the top, or just remove it with the next step. Another option would have been to remove the shroud for easier access, but it�s not necessary.
6. Remove the radiator with the fan shroud and the entire lower radiator hose (three sections) attached at the bottom.
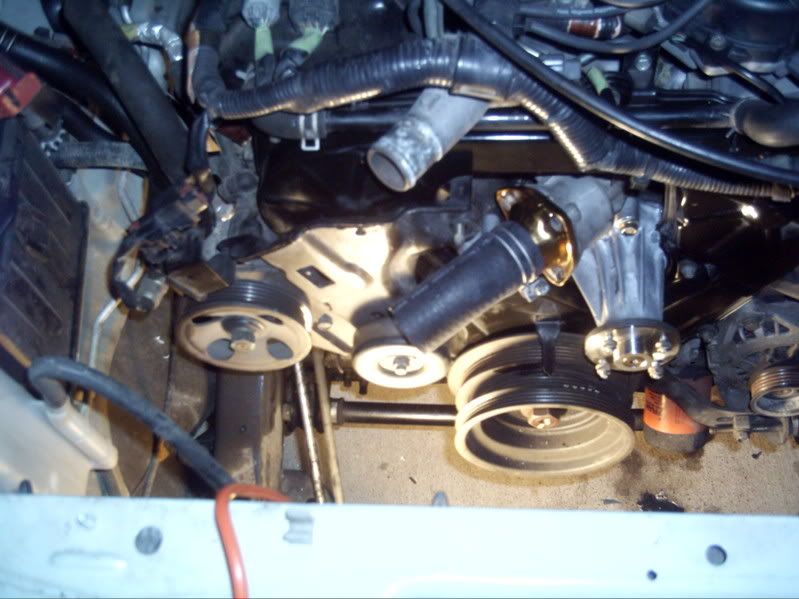
7. Remove all three accessory belts.
8. Remove the bracket assembly including the tensioner pulley.
9. Undo the passenger side fresh air hose spring clamp connection and mounting bolts as well as various other electrical wire connections to get them out of the way of the tbelt cover. I was able to leave the drivers side of the hose connected and just pull it out of the way, even though the book says to just remove the whole thing.
10. Un-plug the wiring harness to the distributor.
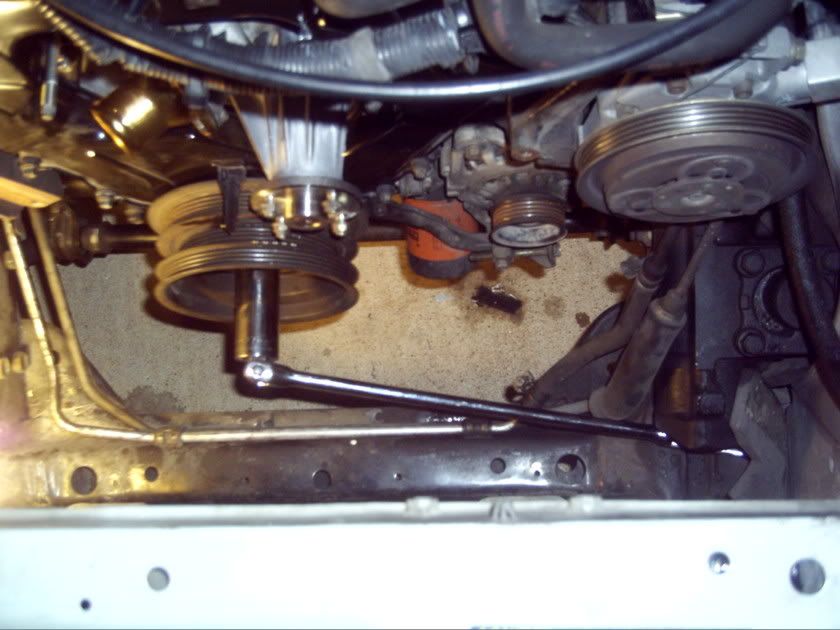
11. Remove the big bolt holding in the crankshaft pulley. I think its 27mm. You�ll never get it off the normal way unless you have an impact wrench; it�s over 100 ft/lbs. I accomplished the task by setting the socket with a 1/2 in. breaker bar to the bolt, putting the end of the breaker against the top of the frame on the drivers side, and then quickly turning the key and letting the starter provide the needed torque. Worked like a charm. Here�s a pic to illustrate:
12. Remove the upper timing belt cover.
13. Rotate the crankshaft pulley clockwise slowly until all of the timing marks line up to top dead center. On the crankshaft pulley, there are 5 white marks. Align the 1st mark (from the left) with the metal arrow sticking out of the lower timing belt cover. Since you removed the upper timing belt cover already, you can see punch marks on the front edges of the camshaft pulleys. These need to line up with two marks on the upper rear timing cover. On the passenger side it�s at about the 10 o�clock position, and on the drivers side its about the 2 o�clock position. If you have the crank pulley aligned but the two camshaft marks aren�t, keep rotating the crankshaft and they will eventually line up near-perfect. I say near-perfectly because on mine, it was close, but not perfect. Just get it as close as you can for now.
14. Use a puller to remove the Crankshaft pulley. I�ve read on this board where someone used a gear puller. I went to napa and they said to use a harmonic balancer puller, because with a gear puller pulling on the outside of the pulley, it may warp the harmonic balancer. �OK� I said, and rented their harmonic balancer puller. Only problem is, the puller they gave me came with bolts that are much too big to fit in the two small bolt holes. I tried all sorts of sizes and never found the right one. I eventually used some long wood screws with the harmonic balancer puller and just hand tightened them in enough so that they would bite into the holes and stay put. This part of the job took much longer than it should have.
15. Remove lower timing belt cover.
16. Now we�re getting somewhere. Use an allen wrench (or your hands if you don�t have one) to release the tension on the belt and pull it off. If you�re going to re-use your timing belt (meaning your only in here for a water leak), you should mark on the belt where all the timing marks were from the two cam gears and the crankshaft gear. White-out works best. Also, mark an arrow on the back of the belt pointing to the front of the truck. Make sure you don�t rotate the crankshaft or camshafts with the timing belt removed, or the pistons will hit the valves. Bad idea.
17. Remove the thermostat cover and thermostat.
18. Remove the camshaft sprockets. Make sure you don�t rotate them while you do it. There is probably a special tool, but I just stuck the end of a socket wrench into one of the holes in each camshaft sprocket to keep it from moving.
19. Remove the upper rear timing belt cover (4 bolts).
20. Unbolt the water outlet housing with the bypass hose still attached. It�s easier this way.
21. Remove water outlet housing. You�ll have to move the spring clamp for the bypass hose and then wiggle it free from the thermostat housing.
22. Remove the water pump.
23. Remove the timing belt tensioner. Move the spring to your new tensioner, or just use a new spring.
Now you have it all apart. Hope you put your bolts into baggies and labeled them with a sharpie like I told you. Installation is the reverse, but here are some reassembly tips.
Water pump: The new gasket covers the whole rear surface of the water pump, but you only need to use RTV around the part that holds water (the middle part). Plus, you�ll need to transfer the studs from the old water pump to the new one. I did this by putting a nut on backwards, then another one on top of it frontward and tightening them together. You can then back out the stud with a box end wrench on the first (bottom) nut. Leave the nuts on there and finger tighten the stud into the new water pump with loctite. Tighten it down using the second (top) nut. Then you can break apart the nuts with two wrenches and go do the next stud. There are also two rubber sticks along the bottom sides of the water pump. My manual reccomends replacing them, but I reused the old ones and added a little of the old RTV. All it does is seal out dirt from getting into the tbelt chamber from the outside.
Bypass Hose: I found it easiest to put the new hose on the water outlet housing while it was removed, Then install the outlet housing with new gasket, then connect the hose to the tstat housing. Be careful which direction you put the spring clamps on this hose, since they may run into the back tbelt cover and compromise tension on the hose. Better yet, be smarter than I was and replace those spring clamps with the screw types.
Camshaft sprockets: You�ll need to just put them on with a small amount of torque until you get the new timing belt on. You don�t want to risk turning the camshaft and running the valves into the crankshaft. My FSM says to lube up the bolt with new motor oil before you torque it down. If you forgot, yes you can remove the camshaft bolt completely while the timing belt is on there.
Timing belt and tensioner: Install the tensioner and temporarily tighten the bolt so that the tbelt will have some slack. If you get the dealer timing belt (like you should), it has white lines on it, and arrows that point towards the front of the truck. Make sure you line up the lines on the belt with the timing pock marks on the camshaft sprockets and the crankshaft sprocket. It�s easier to use the marks on the new belt rather than relying on the marks on the engine, because the crankshaft mark is rather difficult to see. It is supposed to be at about the 5 o�clock position, but I couldn�t see any mark there at all on my truck. After the belt is on, loosen the tensioner nut so that tension is applied to the belt. Recheck your timing marks and then rotate it one full revolution (you can temporarily install the crankshaft pulley bolt to help you turn the crank). Then tighten the tensioner nut with loctite. It is not necessary to reset your timing after a tbelt job, unless it was off before. Even if the timing was slightly off before, simply replacing the belt could fix it, since they do stretch a little.
Thermostat: Install the thermostat with the air hole at the top. On mine, there was a good bit of corrosion on the inside of the thermostat cover. I called Douglass Nissan and they ordered me a new one for 7 bucks. The cover looks symmetrical, but there is a notch in the top which should go on top. Use a good amount of RTV around the edges and don�t torque it down too tight. I think its 15 ft/lbs, but I�m going by memory, so look it up if you really care.
Hoses: There are arrows and marks on new Nissan hoses to help you line them up when you are installing them. The �B� on the upper and lower hoses lines up with the �T� looking marks on the radiator. Also, there are arrows to align the lower radiator hose with the short pipe section. Also, Autozone will sell you a �cut to fit� section of hose that they say will replace the short section of lower hose that goes from the pipe to the thermostat cover. Don�t get it, its too small.
Now for some pics I took during the assembly process.
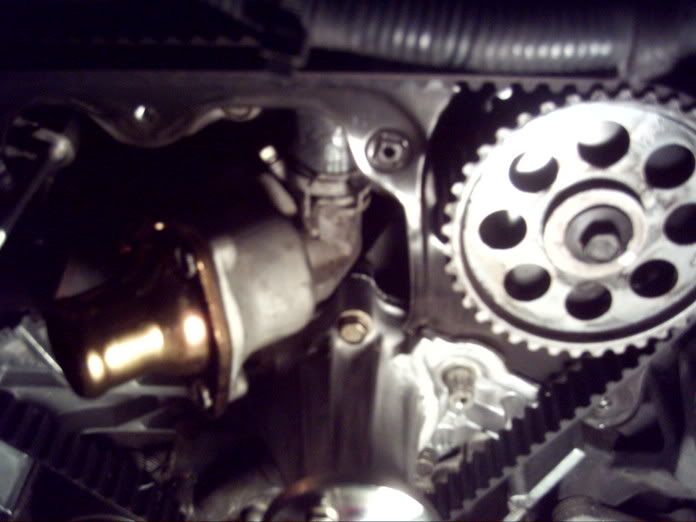
1. This picture was taken after I installed the new waterpump, thermostat cover, water outlet housing gasket, bypass hose, timing belt, and tensioner. The cover is still off the timing belt. Notice my shiny new tstat cover (7 bucks at the dealer). Note that the timing marks are not aligned in any of my pictures since I had rotated the assembly a little when torqing down the cam sprocket bolts.
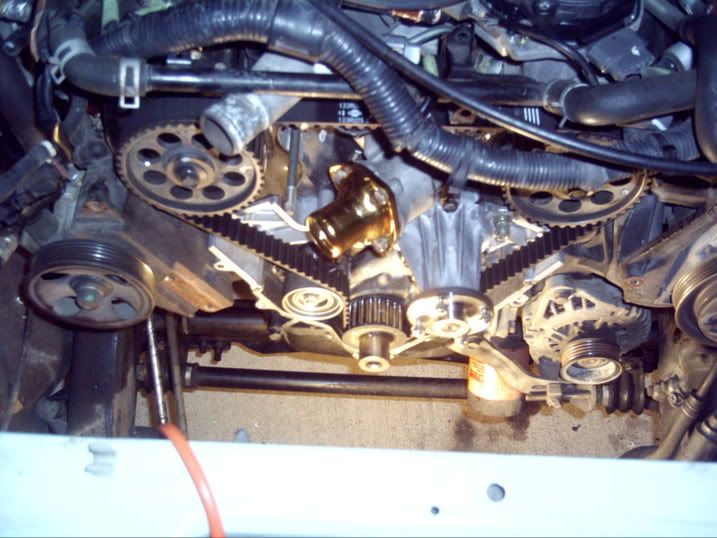
2. This is a closeup of the bypass hose that causes headaches for so many X's. Sorry its blurry, my camera sux. See how nicely the rear timing belt cover blocks any real access to the hose? While it probably (might) could be done, I wouldn't want to try to replace this hose with the timing belt on.
3. Timing belt cover is on.
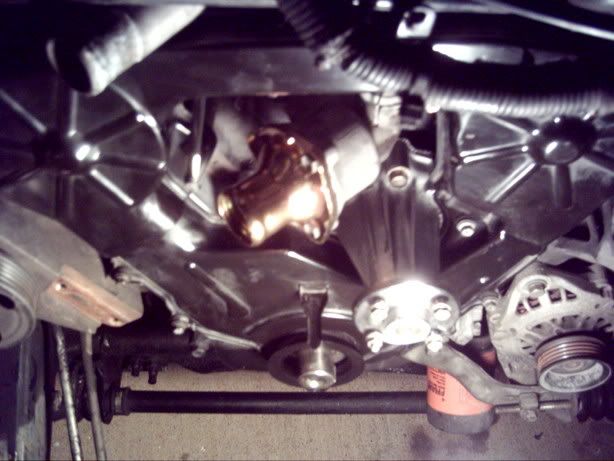
4. I put on the short section of lower hose next while access is still good. Not a requirement at this point however. In fact I was wishing I would have put the short hose onto the pipe first, since it slid so easily over the new tstat housing. It was a booger getting it onto the short pipe with no access.
Also you can kinda see that I reconnected the fresh air intake pipe that runs along the top tbelt cover and goes into passenger side rocker cover.
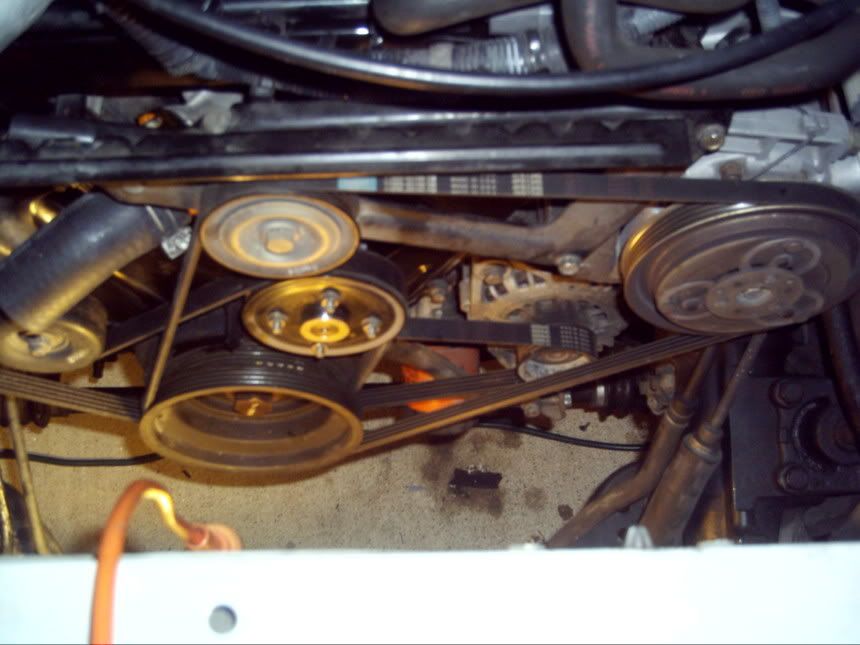
5. Installed all tensioner brackets and accessory belts. So much easier when the radiator is out.
Thats the end of my little FAQ. Hopefully I didn't leave anything out. If I did, its because I'm going by memory. Good Luck!


![[ThumbsUp]](graemlins/thumbsup.gif)
 Previous Topic
 Index
Index